Welcome to my ultimate heirloom seed planting guide!
In this (very long) article, you will find out how to plant almost all species of crop from heirloom seed.
I also go over tons of tips and tricks for the best possible outcome that you can give your vegetable garden to thrive.
Planting with a good foundation of knowledge will behoove the output of your garden. Every plant is different and requires a multitude of variations which can be difficult to achieve. However, if you follow the basics, your plants should be happy and provide a bounty of fruits and veggies.
I have also compressed all of this information into a printer-friendly planting guide PDF (so you can have a physical copy to store with your survival seed pack.
Please refer to the table of contents to navigate through this article as there is a lot of information. Also, don’t forget to bookmark!
And one more thing. If you don’t see the vegetable or fruit your looking for, please drop me a comment and I will add to both the article and the PDF.
Artichoke
| Prefers: | Cooler weather |
| Season: | Spring, Fall |
| Hardiness Zone: | 3-11 |
| Temperature Tolerance: | 20 degrees F |
| Soil pH: | 6.5-7.0 |
| Days to Maturity: | 85-100 days |

Starting Artichoke from seed
You can start artichoke seeds indoors about 2 months before your last frost date. You will have artichoke fruits midsummer thru fall. The seeds need temps in the low 70s to germinate and will sprout in about 2-3 weeks.
Growing foundations
Artichokes prefer cool damp climates and need moist well draining soil to perform well. They grow very well in Northern California temps. Artichokes are quite hardy and can fair well in freezing climates if well mulched. Artichokes are a perrenial and will keep producing for years if not frozen out over the winter or overheated in the summer.
Plant your artichoke seeds about 1/2 inch deep and space 6 inches apart.
Harvesting Artichoke
Harvest the artichoke while is is a full bud, if you do not harvest it, it will become a huge purple beautiful thistle flower!
Artichoke tips
You can plant artichokes as annuals if your climate does not agree with the plant year around. Asparagus make a great companion plant!
Arugula
| Full sun, partial shade | |
| Prefers: | Cooler weather |
| Season: | Spring, Fall |
| Hardiness Zone: | 3-11 |
| Temperature Tolerance: | 45-65 degrees F |
| Soil pH: | 6.0-7.0 |
| Days to Maturity: | 40 days |
Starting Arugula from seed
Arugula is an easy grower and you can start to plant as soon as the spring soil is fully thawed. Plant your seeds directly in the soil, cover them lightly, and water them down gently.
Plant seeds no more than ¼ inch deep in rows. Space the seeds an inch apart. You can also cast the seeds over an area and then thin the seedlings to be 3-4 inches apart.
The seed will begin to germinate around 7 days.
Once the plants have sprouted some true leaves, thin them to about 4 inches apart. This will help reduce overcrowding and risk of disease.
Growing foundations
Arugula has shallow roots, so you need to keep them consistently well-watered. Avoid watering the leaves to reduce the chance of mildewing.
Arugula prefers nitrogen rich soil; if your soil is not nitrogen rich, you can easily amend some fertilizer in. Arugula does good with a fair deal of sun, but you can plant them in part shade to reduce sun damage and bitterness in warmer temps.
Harvesting Arugula
Arugula is a quick grower and can be harvested in about 40 days. When you do harvest, pinch off the outer older leaves as the plant will keep producing more leaves.
The more you harvest, the more produce the plant will grow.
Arugula tips
Arugula’s flavor will get stronger the more you harvest and the warmer it gets. It will turn more bitter as the summer heat grows.
If your Arugula begins to melt in the hot summer sun, cover with shade tents for relief.
Plant in early spring and late summer for two harvests. You can also plant all season long, every two to three weeks, for continual produce.
Beans, Bush
| Exposure: | Full sun |
| Prefers: | Warm weather |
| Season: | Summer |
| Hardiness Zone: | 3-10 |
| Temperature Tolerance: | 70-85 degrees F |
| Soil pH: | 6.0-7.0 |
| Days to Maturity: | 55-60 days |

Starting Bush Beans from Seed
Sow your bush bean seeds directly into the soil as they do not handle transplanting well. They like the warmth and will germinate nicely between 65-75F.
Plant your beans about one inch deep and space 4 inches between them. Make sure to cover with soil and tamp down. Keep your rows 18” to 24” apart.
Growing foundations
Bush beans grow to about 2 feet, blossom, provide a single harvest, and then die. Therefore, you can plant throughout the season for a continuous harvest. Make sure to plant your final crop 8 weeks before the first frost.
Bush beans do well in most soil types but do like a well-draining organic rich soil. You can amend with compost to add in more organic matter.
Harvesting bush beans
Pluck beans when they are about 3-5 inches long and before you can see the outline of the inner beans. If you would like dry beans, let them dry on the vine for weeks.
Bush bean growing tips
If you are growing bush beans several years in a row, make sure to rotate your planting area every year as this will prevent diseases from killing the seedlings.
Bush beans collect nitrogen from the air, so don’t rely on nitrogen-rich fertilizer. Rather, they like compost and organic matter better.
Beans, Pole
| Exposure: | Full sun |
| Prefers: | Warm weather |
| Season: | Summer |
| Hardiness Zone: | 3-10 |
| Temperature Tolerance: | 70-85 degrees F |
| Soil pH: | 6.0-7.0 |
| Days to Maturity: | 65-70 days |

Starting Pole Beans from Seed
Pole beans need quite a bit more space than their bush bean counterparts, so plant your beans 6 inches between plants. Plan for 3 feet between bean rows.
Plant beans at a depth of one inch and cover completely and tamp down. Make sure temperature in the soil is at or above 65F for proper germination.
Growing Foundations
Pole beans need support from a structure (hence “pole”) and do well growing up lattices, fencing, or any type of natural support that they can vine up.
Pole beans get significantly bigger than their bush cousins.
Harvesting Pole Beans
You will be harvesting your pole beans within 60 days. Pick them when they are nice and plump but don’t wait too long or they can become bitter.
If you want dried beans, let them dry on the vine for weeks.
Pole Bean Tips
Pole beans can get infested with beetles; spray a light mist of soapy water to deter them.
One nice thing about pole beans is that you can harvest them upright, giving your back a break!
Beets
| Exposure: | Full sun |
| Prefers: | Cool weather |
| Season: | Spring, Fall |
| Hardiness Zone: | 2-10 |
| Temperature Tolerance: | 50-85 degrees F |
| Soil pH: | 6.5-7.5 |
| Days to Maturity: | 60 days |

Starting Beets from Seed
Beets can be hard to germinate as their seeds have a hard exterior. The best thing to do is soak them for at least a half hour before planting.
Some have had success transplanting seedlings, but I recommend planting directly in the soil.
Plant your beet seeds about ½ inch deep and 1 inch apart. Thin to 3-4 inches apart when seedlings reach 4 inches tall or so. Leave 12 inches between rows.
Growing Foundations
Beets do good in crappy soil so don’t worry about fertilizer.
Beets like cool weather but they also like bright sun, so if you can nail this combo you will have beautiful large happy beats.
Harvesting Beets
You can harvest the beet early or late, but if you want the classic 2 inch size beet, then harvest around 65 days. If you wait to long to harvest, the roots become fibrous.
Separate the tops from the beet so the greens don’t suck out the moisture of the beet.
Beet Tips
Many people have never had fresh beets, only canned or pickled. Fresh beets have such a good flavor, so give beets another chance! Try slicing them and putting them directly on the grill.
Beet green are very good to eat! Pick some off while the beet plant is young.
Broccoli
| Exposure: | Full sun, partial shade |
| Prefers: | Cool weather |
| Season: | Spring, Fall |
| Hardiness Zone: | 3-10 |
| Temperature Tolerance: | 45-85 degrees F |
| Soil pH: | 6.0-6.8 |
| Days to Maturity: | 50 days |

Starting Broccoli from Seed
Broccoli seeds will germinate in temperatures as low as 40F and they do love the cooler weather. Broccoli prefers organically rich slightly acidic soils.
You can start your seedlings indoors and have them ready to plant immediately after the last frost. Start them indoors 8 weeks prior to last frost. Move your seedlings outdoors when they are six inches tall.
Plant broccolis 12-18 inches apart and space rows 36 inches apart. If you are planting for fall harvest, sow seeds outdoors 100 days before the first fall frost.
Growing Foundations
Hot summer heat can ruin the flavor of your broccoli as full sun will encourage flowering. You can deter this by growing in partial shade or planting in the fall for hotter climates.
Apply a nice thick layer of mulch to keep the ground cool and your broccolis happy.
Harvesting Broccoli
Pick your broccoli when the heads are fully formed and are about 6 inches across, give or take. Pick before they yellow as that indicates flowering.
Cut the stalk lower than what you see at the grocery store and cut it at a slant.
Broccoli Tips
Smaller side shoots will grow where you cut your broccoli, amend your plants with some fertilizer to give them a boost.
Brussels Sprouts
| Exposure: | Full sun |
| Prefers: | Cool weather |
| Season: | Spring, Summer |
| Hardiness Zone: | 2-9 |
| Temperature Tolerance: | 45-80 degrees F |
| Soil pH: | 6.0-6.8 |
| Days to Maturity: | 90-115 days |

Starting Brussels Sprouts from Seed
I suggest starting your seeds indoors about 6 weeks before the last Spring frost, about ½ inch deep. Move them to the outside when they are 3 inches. Plant your sprouts 14-18 inches apart, and the seedlings about ¼ inch deep.
Growing Foundations
Brussels sprouts have quite a long growing season and are not too happy with hot weather. That being said, Southern gardeners may be able to squeak out a fall crop.
Brussels sprouts like to be fed so plan to feed them once a month for two months.
Harvesting Brussels Sprouts
Start by picking the orbs when they are firm and deep green. Harvest the ones from the bottom up as those ripen first.
Twist or snap off the little cabbages from the stalk.
Brussels Sprouts Tips
Remove lower leaves to quicken the development of the sprouts.
A little bit of frost can enhance the flavor of your brussels sprouts. Make sure to pick before they yellow as they become bitter.
Cabbage
| Exposure: | Sun, partial shade |
| Prefers: | Cool weather |
| Season: | Spring, Fall |
| Hardiness Zone: | 2-9 |
| Temperature Tolerance: | 45-80 degrees F |
| Soil pH: | 6.5-6.8 |
| Days to Maturity: | 90 days |

Starting Cabbage from Seed
Start your cabbages indoors about 6-8 weeks before the last expected frost, but plant them outdoors 2 weeks before the actual last expected frost! Make sure to harden them off before transplanting. They should be about 4 inches tall for transplanting.
Plant your cabbages about ¼ inch deep and leave 18 inches between each plant.
You can also seed directly into the soil once your soil has thawed out.
Growing Foundations
Cabbages are hungry and need compost or manure amended into your soil prior to planting. Keep adding nitrogen as heads form to keep them pumped up.
Keep your soil moist to prevent head splitting. Head splitting can happen from too much rain than being too dry. It can also happen by too much fertilizer at the end of their growing season.
Harvesting Cabbages
Wait to harvest cabbage until the head is nice and firm throughout.
Cut the cabbage at the base with a sharp knife.
Cabbage Tips
Use a shade cover to keep cabbages from overheating during the hot summer months. Cabbages do prefer cooler weather.
Carrots
| Exposure: | Sun, partial shade |
| Prefers: | Cool weather |
| Season: | Spring, Fall |
| Hardiness Zone: | 3-10 |
| Temperature Tolerance: | 50-85 degrees F |
| Soil pH: | 6.0-6.8 |
| Days to Maturity: | 65 days |

Starting Carrots from Seed
You will need to direct sow your carrots seeds into your soil as they do not tolerate transplanting whatsoever. Luckily, they are an easy sprouter and you will see your carrots coming up within 3 weeks or so.
Carrots like a sandy type soil and will need room to grow down, so till your area to be free of roots and rocks to about 12” deep.
Carrot seeds are teeny tiny but you will want to give them a good couple of inches apart from each other. Plant them shallow, only 1/8 to ¼ deep.
If your carrots become overcrowded, trim the excess carrot tops as pulling them out could cause damage to neighboring carrots.
Water your seeds in lightly once sowed.
Growing Foundations
If your carrots grow fat and round, your soil has not been loosened up enough before planting. Carrots actually do well in containers which is helpful to managing soil.
Carrots do not like too much nitrogen so be careful adding in hot manure or anything nitrogen rich. Carrots also require some phosphorus which can be amended in via bone meal.
Harvesting Carrots
Easy! Pull the carrot out by the top. Loosen the dirt around the carrot if its too tight to pull out.
You can tell when your carrots are ready to harvest when the top of the carrot bulges out of the ground and is about a half inch thick. If you do not see the top of the carrot, brush away the soil to check.
Carrot Tips
Make sure to harvest carrots before bolting – before the plant starts flowering and seeding.
Carrots like cold weather and appreciate a good frost; it will bring out the sweet flavor of the carrot.
Cauliflower
| Exposure: | Full sun |
| Prefers: | Cool weather |
| Season: | Spring, Fall |
| Hardiness Zone: | 2-11 |
| Temperature Tolerance: | 45-85 degrees F |
| Soil pH: | 6.0-7.0 |
| Days to Maturity: | 80 days |

Starting Cauliflower from Seed
You will want to start your cauliflower from seed indoors, between four to six weeks before that last frost date. Sow them about a ¼ inch deep into bio pots that will disintegrate when you plant them. This will avoid root disturbance.
You will want to keep your seedling soil at 70 degrees with a seedling heat mat for best results. Place them in a sunny window and keep the soil moist.
Once your seedlings have developed adult leaves, you can transplant them. Take care to harden them off.
Keep your cauliflowers apart 18-24 inches.
Growing Foundations
Cauliflower needs a soil pH between 6.0-7.0, 6.5-6.8 is even more ideal.
Cauliflower grow best in cool weather so although they need full sun, if you place them in a partial shade area in warmer climates, it can protect them from a spike in temperature.
You will want to keep your cauliflower evenly moist; do not let the plant dry out. You can add some mulch around the plants to keep in moisture and keep out too much heat.
Harvesting Cauliflower
Cut the heads off by the stem with a knife. You can keep some leaves on as those are edible and tasty.
You know your cauliflower is ready when the heads are firm and compact. Expect the heads to be close to 6 inches in diameter, but harvest if the heads are ready to go if they do not get to that diameter.
Cauliflower Tips
Cauliflower can be tricky to grow and if not grown properly it can result in the curds being fuzzy. Follow the climate, soil, and moisture conditions for best results.
When the cauliflower head reaches 2-3 inches in diameter, you will want to blanch the leaves to attain the whitest curds. Blanching is covering the exposed head with the plant’s own leaves. Gather the leaves around the head and bind with twine or a rubber band.
Peak in on your cauliflower every couple of days and harvest once ready.
Celery
| Exposure: | Full sun |
| Prefers: | Cool weather |
| Season: | Spring, Fall |
| Hardiness Zone: | 4-10 |
| Temperature Tolerance: | 50-70 degrees F |
| Soil pH: | 6.0-6.5 |
| Days to Maturity: | 120 days |

Starting Celery from Seed
Celery seed needs direct sunlight to grow but does best starting indoors then transplanting. An LED grow light is an efficient, low cost lighting method to starting seedlings indoors. Start your seeds 8-10 weeks before your last average frost. Lay in 2-3 seeds per seedling pod, but do not push into the soil.
Celery seed is extremely tiny, but you do not want to have too many seedlings in one pod. You can dampen the end of a toothpick to pick up the tiny seeds and scrape into the soil.
Germination can take up to 18 days. Make sure to harden your seedlings before fully transplanting. Plant your celeries 12 inches apart.
Growing Foundations
Celery does not like too hot of weather and needs to stay cool. For warmer climates, a fall sowing will fare better than a spring sowing.
Celery does not like sand or clay and needs super rich compost-like soil to perform its best.
Celery takes a long time to grow so prepare to keep your plants cool and give them care.
Harvesting Celery
You can harvest the entire plant at once or just harvest the outer stalks. Cut at the base fully with a large sharp knife for the whole plant. Once the stalks are a minimum of 6 inches, you can harvest them, or wait until they grow larger.
Celery Tips
You may want to blanch your celery so your produce doesn’t end up bitter. When the celery has doubled in size, bring up the soil to cover its base. That will keep the stalks white and tasty. You can also blanch the upper portion of the celery by binding the top with a rubber band.
Collard Greens
| Exposure: | Sun |
| Prefers: | Cool weather |
| Season: | Spring, Fall |
| Hardiness Zone: | 2-10 |
| Temperature Tolerance: | 30-80 degrees F |
| Soil pH: | 6.5-6.8 |
| Days to Maturity: | 75 days |

Starting Collard Greens from Seed
You can start seedlings indoors during the spring or fall and keep the soil temp at 70 degrees. I recommend direct sowing at 1/2 inch deep with 30 inches in between plants. Collard greens get very large so give them lots of space!
Growing Foundations
Collard greens are a cool weather crop and do well with a bit of frost. They can withstand very cold temps, but will not do well with wild temperature fluctuations.
Collards are a brassica and can be grown with the same methods.
Harvesting Collard Greens
You can harvest the whole plant when the plant leaves have turned a deep green. Alternatively, you can harvest leaves while leaving the buds on the plant, allowing them to grow.
Collard Green Tips
Wrap the harvested leaves in a moist paper towel within a perforated plastic bag to allow for maximum storage life.
Corn, Sweet
| Exposure: | Full sun |
| Prefers: | Warm weather |
| Season: | Summer |
| Hardiness Zone: | 4-8 |
| Temperature Tolerance: | 70-90 degrees F |
| Soil pH: | 5.8-6.8 |
| Days to Maturity: | 90 days |

Starting Corn from Seed
Corn is a warm weather lover and your soil needs to be at least 60 degrees before sowing seeds.
Place 2-3 seeds in holes about a half inch deep. Keep your corns about 12 inches apart. Thin your seedlings to only one per hole and choose the strongest sprout. Keep your rows 36 inches apart.
You can speed up the germination process and success by soaking your corn seeds overnight.
Growing Foundations
Corn needs nitrogen to grow and will do best if nitrogen rich compost or manure is amended to the soil before planting.
Keep your corns nice and moist as they require good watering to grow properly.
You will want to feed your corns with a fertilizer rich in nitrogen when your plants are 12-18 inches.
Harvesting Corn
Harvest when the corn silks become a light brown and the corns feel plump when squeezed. You can also pull down the leaves from the top and check the top kernels, they should be firm, plump, and milky.
Bend and pull the ear in a down motion from the stalk while twisting.
Corn Tips
For home growers, plant your corn in a square as opposed to a row for better pollination between the tassels. Corn is wind pollinated so the success of pollination becomes much higher when in a square formation.
If you are growing more than one variety of corn, keep species apart by at least 500 feet or vary growing times to avoid cross pollination.
Cucumber
| Exposure: | Full sun |
| Prefers: | Warm weather |
| Season: | Summer |
| Hardiness Zone: | 4-12 |
| Temperature Tolerance: | 65-85 degrees F |
| Soil pH: | 6.0-7.0 |
| Days to Maturity: | 65 days |

Starting Cucumber from Seed
Directly sow your cucumber seeds a month after the last frost in the spring. You can also start them indoors 4-6 weeks before the last frost, use a grow light and plant in a seed starting soil mixture.
Plant your seeds a half inch apart and give your cucumbers plenty of space. They do well in hills spaced 18 inches apart.
Germination takes approximately 10 days when temps are around 70 degrees.
Growing Foundations
Cucumbers love nitrogen and will need a good side dressing of compost, manure, or fertilizer once a month. If your cucumber leaves yellow, they are probably not getting enough nitrogen.
Do not let your soil dry out completely. You can accomplish this with a nice layer of mulch.
Harvesting Cucumbers
Pick your cukes before they have fully matured as the fruit gets very seedy once they have grown to their biggest size, which is about 6-8 inches.
Pick them off by cutting with a knife, as pulling them off can damage the vine.
Cucumber Tips
Cukes do well growing vertically on a trellis or in a raised bed, or even in a pot! This also helps prevent mildewing.
Higher temps produce more male flowers which will appear first and fall off. You can circumvent too high of heat by placing a shade over the plant.
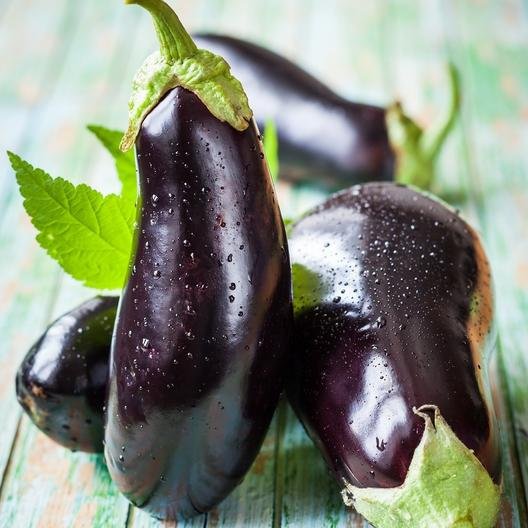
Eggplant
| Exposure: | Full sun |
| Prefers: | Warm weather |
| Season: | Summer |
| Hardiness Zone: | 5-12 |
| Temperature Tolerance: | 65-85 degrees F |
| Soil pH: | 5.5-6.0 |
| Days to Maturity: | 75-80 days |
Starting Eggplant from Seed
Eggplant seeds require warm soil from 60-85 degrees to germinate and take a good long while to harvest so you will likely have to start your seed indoors.
Start your seedlings indoors 8-10 weeks before your expected last frost into spring. Keep your seedlings nice and moist and warm. This can be done by placing plastic wrap over them and with a heating mat. Seedlings will come up within 7-14 days. Once sprouted, place them under grow lights or by a bright window.
Plant your seeds ¼ inch deep and space your plants 18-24 inches apart. Harden off seedlings before transplanting.
Growing Foundations
Eggplants love hot weather and fare well over 70 degrees. Any temps below that and you will see a noticeable dip in their overall happiness.
Raised beds and pots are ideal as the temps of the soil warm up quicker than in the ground.
One Black Beauty eggplant plant will yield about 4-6 fruits. Fruits can get very large and can weigh as much as 1-3 pounds.
Harvesting Eggplant
Harvest when the skin of the eggplant is glossy. Simply cut with shears at the stem.
Eggplant Tips
Although eggplant loves heat, temps above 95 degrees will cause plants to stop setting fruit. Water liberally when fruits are developing.
Stake your eggplant to give it support while fruiting.
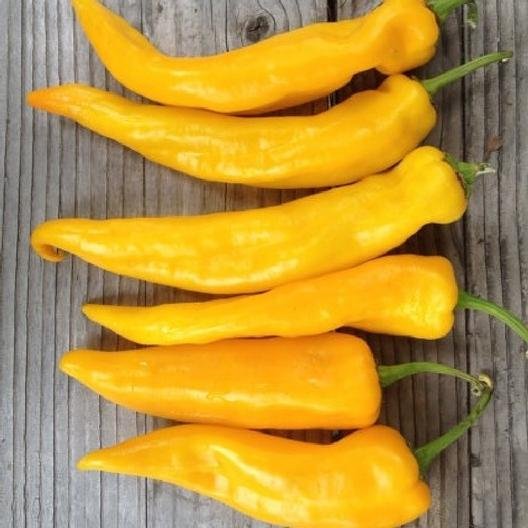
Hot Peppers
| Exposure: | Full sun |
| Prefers: | Warm weather |
| Season: | Summer |
| Hardiness Zone: | 4-11 |
| Temperature Tolerance: | 60-85 degrees F |
| Soil pH: | 6.0-6.8 |
| Days to Maturity: | 75-85 days |

Starting Hot Peppers from Seed
Peppers love a warm and dry climate and need soil to be at least 70 degrees for germination. Plant three seeds to one hole and thin to two plants once sprouted; the two will grow as one plant.
Start your peppers inside 8-10 weeks before your last frost date and only transplant once your soil is consistently staying at 65 degrees.
Space plantlings 18-24 inches apart.
Growing Foundations
Peppers are typically pest tolerant but can succumb to mildews. The bulk of their produces comes in when the temps start to cool down at night.
Peppers like their soil to be warm and moist for the best results. Avoid high nitrogen fertilizers; this will cause leafy plants with few fruits. Instead, use an aged compost for nutrients.
Harvesting Peppers
Harvest peppers by cutting off the stem once they are firm, full, and of the appropriate color. You can also harvest hot peppers when green for a different flavor and less heat.
Hot Pepper Tips
You can dry your overabundance of hot peppers using a food dehydrator allowing the fruit to fully dry.
If your flowers are dropping before fruiting, it could be caused by too high of temps and high winds.
Kale
| Exposure: | Full sun |
| Prefers: | Cool weather |
| Season: | Spring, Fall |
| Hardiness Zone: | 2-9 |
| Temperature Tolerance: | 20-80 degrees F |
| Soil pH: | 5.5-6.8 |
| Days to Maturity: | 60 days |

Starting Kale from Seed
Plant your kale in the spring and again in the fall for a double harvest. Sow your seeds directly outside after the last frost. Sow seeds again in August or September for a double harvest.
Plant seeds ½ inch deep and thin to 8-12 inches apart.
Growing Foundations
Kale loves the cool weather and will become bitter as the weather gets hotter. Do not overwater your kale but keep the watering consistent.
If you mulch heavily after the first freeze, you may be able to keep your kale going throughout winter.
Harvesting Kale
Pick the leaves towards the outside of the plant and only pick a handful at a time so you can keep your plant growing and productive.
Do not pick the center terminal leaves, if you do, the plant will stop producing.
Kale Tips
Kale will keep growing all the way down to 20 degrees. A frost will sweeten up your kale.
Lettuces
| Exposure: | Sun, partial shade |
| Prefers: | Cool weather |
| Season: | Spring, Fall |
| Hardiness Zone: | 4-9 |
| Temperature Tolerance: | 20-80 degrees F |
| Soil pH: | 6.0-6.5 |
| Days to Maturity: | 30-70 days |

Starting Lettuces from Seed
The sweet spot for planting lettuce seeds is in between 50-80 degrees.
You will want to direct sow your lettuces straight into the ground by means of sprinkling. Cover your seeds with a thin layer of soil. You will see your lettuces sprouting from 7-10 days. Plant your seeds 4 weeks before the last frost. Seeds can also be planted in late summer.
Once your seedlings come up, start to thin to the tune of 4 inches for leaf, 6 inches for loose heads, and 16 inches for firm heads.
Growing Foundations
Temps above 80 degrees will cause your lettuce to become bitter.
Lettuces grow rather easily, and soil prep is simply done with compost, manure, or potting soil.
Lettuce plants have a shallow root system and need a steady supply of water.
Harvesting Lettuces
Do not wait for your lettuce to be fully mature. You can begin harvesting as early as 30 days in for baby lettuce leaves. Pick the outer leaves and keep the inner terminal leaves growing for continued harvesting.
Butterheads and Romaines can be cut entirely.
Lettuce Tips
You can try to overwinter your lettuces by protecting your fall crop with a thick bed of mulch or straw to keep in heat. If it gets too cold, the lettuce will go dormant, but should keep growing down into the 20s.
Melon
| Exposure: | Full sun |
| Prefers: | Warm weather |
| Season: | Summer |
| Hardiness Zone: | 3-11 |
| Temperature Tolerance: | 50-95 degrees F |
| Soil pH: | 6.0-6.5 |
| Days to Maturity: | 90 days |

Starting Melon from Seed
Melons like it warm and need the soil to consistently stay above 70 degrees. Colder climates will have a better chance of bringing their melons to fruition if started indoors. Keep your melon indoors until the appropriate soil temp has come about.
Plant your melon down 1 inch deep and keep your spacing from at least 24-36 inches. Melons will take as much room as you give them and even more by climbing up and over things.
Growing Foundations
Melons sprawl out and need lots of space for their vines and fruits. They also love sandy soil and will propagate extremely well in sandy conditions. If you do not have sandy conditions, you will need soil that drains very well. Think about amending some sand into your plot.
You do not want to overwater your melons once the fruit is coming on as it could cause the melons to burst. Rather, water just enough to keep the leaves perky.
Harvesting Melons
Your melon is ready when it is easy to pull from the vine but not quite falling off. The vine may be dead or browning at this point.
The melon is ready when you can get a good thump out of it.
Melon Tips
You can place some old cardboard or mulch under your melon vines and fruits to avoid mildews and rot.
Making a mound for your seedling is a good way to separate plants with plenty of room.
Okra
| Exposure: | Full sun |
| Prefers: | Warm weather |
| Season: | Summer |
| Hardiness Zone: | 6-11 |
| Temperature Tolerance: | 60-85 degrees F |
| Soil pH: | 6.5-7.5 |
| Days to Maturity: | 60 days |

Starting Okra from Seed
Soil needs to be around 65-70 degrees so either start your okra indoors four weeks before the last frost or direct sow in the spring.
Soak your seeds in room temperature water overnight for better germination success.
Plant your seed ¼ inch deep and 12 inches apart. Once the plants get larger, you can thin them to 3-4 feet apart.
Growing Foundations
Okra likes a well-drained soil that is fertile and is not too picky about soil types, as long as it drains off good.
Make sure to plant your okra in full sun.
Harvesting Okra
Your first harvest should be around the two month mark. Okra will continue to produce more okras every few days. Cut the okra above the cap of the fruit.
Okra Tips
Wear gloves while handling okra as it has tiny spines which can cause skin irritation.
For faster okra produce, cut the leaves off the lower part of the plant after the first harvest.
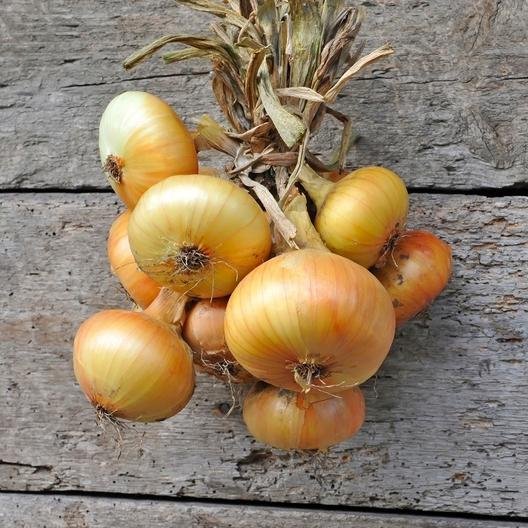
Onion
| Exposure: | Full sun |
| Prefers: | Cool weather |
| Season: | Spring, Summer |
| Hardiness Zone: | Varies |
| Temperature Tolerance: | 40-80 degrees F |
| Soil pH: | 5.5-6.5 |
| Days to Maturity: | 95-165 days |
Starting Onion from Seed
Usually, onions are grown from sets, or tiny little onions sold in a bag. However, you have access to many more varieties from seed.
You will want to start your onion from seed indoors. You can start your onions about 8 to 10 weeks before your last frost.
You can also start onions outdoors if you live in a warm climate and the soil is above 68-75 degrees, but indoor starts are recommended.
Transplant your seedlings when they are 4-6 inches tall and 2-3 inches apart.
Growing Foundations
There are short-day, intermediate-day, and long-day onions. Short onions do better in warmer climates from zone 7 and on. Zone 5 and 6 will be able to have a good short-day onion season. Zone 6 and colder will have a better chance with long-day onions.
Onions like a rich and organic soil. Amend your plot with compost or manure and fertilizer.
Harvesting Onions
When onion tops start flopping over and turning brown, onions are ready to harvest.
You will see the crown of the onion poking out of the ground.
Simply pull the onion out of the ground by its top.
Onion Tips
Onions want nitrogen so be prepared to feed your onions with a high nitrogen fertilizer every two weeks or so. Chicken manure is a good choice for a high nitrogen option.
Pea
| Exposure: | Full sun |
| Prefers: | Cool weather |
| Season: | Spring, Fall |
| Hardiness Zone: | 2-9 |
| Temperature Tolerance: | 30-75 degrees F |
| Soil pH: | 6.0-7.5 |
| Days to Maturity: | 60 days |

Starting Peas from Seed
Soil needs to be warmer than 45 degrees, so plant your peas directly outside 4-6 weeks before the last frost comes.
Plant your peas 1 inch, in full sun, and six inches apart. Space your rows 12 inches apart.
Pea seeds are light so if they start to float to the top, poke them back into the ground gently with a pen.
Growing Foundations
Peas do not like temps warmer than 85 degrees, so if you are in a warmer climate, you will want to get these guys in the ground as early as possible.
Peas like sandy, well-draining soil and will pretty much grow in anything except for thick clays.
Peas collect their own nitrogen, so you don’t need to supplement them.
Harvesting Peas
Your peas are ready to harvest once the pods swell and are still tender.
Pick the peas off by hand and gently to avoid damaging the vine.
The more peas, you pick, the more pea pods the plant will produce, so keep on picking!
Peas Tips
Make sure to water your peas abundantly when the pods are forming. At least an inch a week of rain will suffice, but supplement with more water if needed.
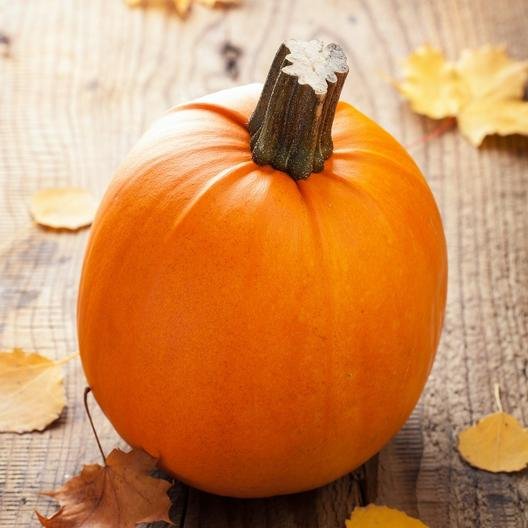
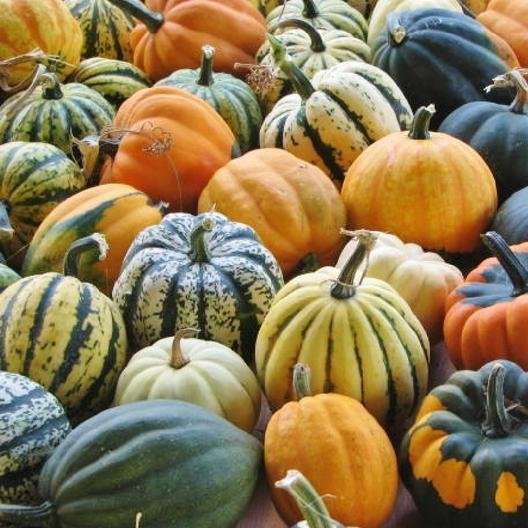
Pumpkin, Sugar
| Exposure: | Full sun |
| Prefers: | Warm weather |
| Season: | Summer |
| Hardiness Zone: | 3-9 |
| Temperature Tolerance: | 50-85 degrees F |
| Soil pH: | 5.5-7.5 |
| Days to Maturity: | 100 days |
Starting Sugar Pumpkin from Seed
Pumpkins need a whole lot of room to grow, think of a pumpkin patch as a kid! Plan on a space of around 20 square feet per plant. This can be achieved on the edge of a garden or some outlying area on your property.
Soil temp needs to be 65 degrees or higher for germination and it takes a good while to reach fruition so plan accordingly depending on your growing zone.
Make mounds and plant 3-5 pumpkin seeds per mound. Poke your seeds in 1 inch deep. Once your seedlings are shooting up, thin to only 2 seeds and leave to grow.
Growing Foundations
Pumpkins require a lot of water but do not need watering frequently. Rather, water your pumpkin when the leaves and vines are looking limp. Give it a good long drink. Infrequent, deep watering will result in a healthy pumpkin plant.
Pumpkins like a rich loamy soil that drains decently well. Pumpkins do not fare well in water logged muddy soil.
Harvesting Sugar Pumpkin
Pick your pumpkin when the color is a proper orange and you get a good thump. Cut the pumpkin off at the stem with a knife.
Sugar pumpkins get about 10 inches in diameter.
Sugar Pumpkin Tips
If you want to enjoy your sugar pumpkin for Halloween or Thanksgiving (pumpkin pie) then count backwards 100 days from when you want to have them ready by.
Radishes
| Exposure: | Full sun |
| Prefers: | Cool weather |
| Season: | Spring, Fall |
| Hardiness Zone: | 2-10 |
| Temperature Tolerance: | 40-75 degrees F |
| Soil pH: | 5.6-7.0 |
| Days to Maturity: | Varies |

Starting Radish from Seed
Once the soil is workable, you can sow your radish seeds straight into your garden as they tolerate soil temps as low as the 40 degree range. Their best germination happens at 55-70 degrees, however.
Plant your seeds ¼ inch deep and 1-3 inches apart. The larger winter variety radishes require ¾ inch sowing with six inches between seeds.
Growing Foundations
Radishes are very easy to grow and will grow fine in most soil types, although they enjoy sandy soil the most. You can amend your soil with fertilizer, if you like.
Radishes grow so quickly and easily, you won’t have to fuss much over pulling weeds.
Harvesting Radishes
You need to harvest your radishes at the proper time as the flavor and texture will deteriorate and become woody.
Radish Tips
Radishes are a good repellant for pests and make good companion planters for other more pest vulnerable crops.
You can do so much more than just having some radish slices on a salad. Try pickling radishes or roasting radishes up like diced potatoes!
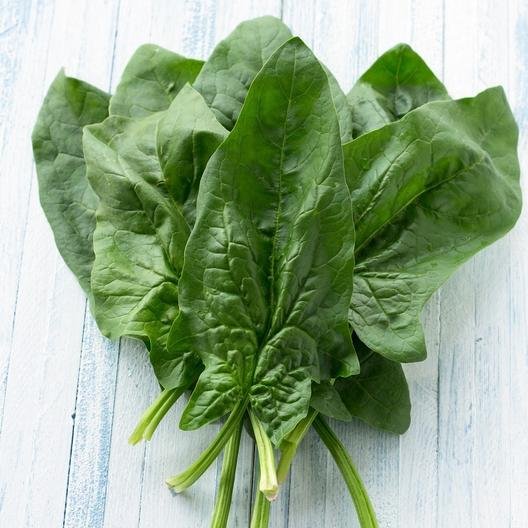
Spinach
| Exposure: | Sun, partial shade |
| Prefers: | Cool weather |
| Season: | Spring, Fall |
| Hardiness Zone: | 2-9 |
| Temperature Tolerance: | 30-75 degrees F |
| Soil pH: | 7.0 |
| Days to Maturity: | 45 days |
Starting Spinach from Seed
You can direct sow spinach from seed straight into the soil once it becomes workable in the Spring.
Sow your seeds ½ inch deep and gently compress into the soil, water lightly.
You will see the seedlings begin to emerge from 7 to 14 days.
Once your seedlings have reached 1-2 inches, thin them to be about 5 inches apart.
Growing Foundations
Spinach is one of the few species that likes a neutral to alkaline soil, however it fares well in most soil types.
Plants need to be well watered during dry spells, aim for an inch of water per week, either from rain or from watering.
Harvesting Spinach
The larger the leaves get, the more bitter the spinach will become. So, pluck off your produce sooner than later. You can pinch off outer leaves or take the whole plant. I personally enjoy baby spinach; when harvesting the baby leaves, leave enough on the plant so it can keep photosynthesis going.
Spinach Tips
Spinach enjoys some shade, freeing up space for your full sun crops. The plant will bolt if it becomes too hot, so plant in early spring and late summer when it starts to cool down for a fall crop.
Summer Squash
| Exposure: | Full sun |
| Prefers: | Warm weather |
| Season: | Summer |
| Hardiness Zone: | 3-10 |
| Temperature Tolerance: | 60-95 degrees F |
| Soil pH: | 5.5-6.8 |
| Days to Maturity: | 45-60 days |

Starting Summer Squashes from Seed
You can start your squashes indoors 3-4 weeks before transplant time. Summer squashes want soil to be 70 degrees or hotter before you direct sow or transplant, so plan accordingly. You will see your plants coming up within 8-14 days.
Sow summer squash seeds ½ inch deep at a spacing of 6 inches apart. Rows need to be 4-6 feet apart.
Growing Foundations
Summer squashes are heavy feeders and need a well draining, well fertilized, rich soil. Keep fertilizing your squashes as they keep growing.
Squashes love water so prepare to water once in the morning and again in the afternoon as summer temps heat up.
Harvesting Summer Squashes
Most squashes start losing their flavor after 4-5 inches in length so harvest early and often.
Cut your fruit off with a knife where it naturally separates from the plant; do not pull or twist off as this can cause damage to the plant.
Summer Squash Tips
You can eat the blooms as they are quite tasty. Just make sure to not over-harvest the blooms as they are needed to pollinate and produce more fruits!
Sweet Pepper
| Exposure: | Full sun |
| Prefers: | Warm weather |
| Season: | Summer |
| Hardiness Zone: | 9-11 |
| Temperature Tolerance: | 60-95 degrees F |
| Soil pH: | 6.0-6.8 |
| Days to Maturity: | 75-100 days |
Starting Sweet Peppers from Seed
Sweet peppers, especially bell peppers, need a long time to grow and summer heat, which can be tricky for colder climates. You will need to start your seeds indoors to compensate for a shorter, cooler summer.
Seeds need a soil temperature of 80 degrees to germinate, so plant on starting your seeds inside 6-8 weeks before the last frost date.
Peppers require hardening before transplanting outside, so bring them up to outdoor speed slowly before planting in the ground. Remove any blossoms the plant has before transplanting.
Plant at ¼ inch deep and space 12-18 inches apart. Plant three seeds at a time and then pluck out the weakest seedling to grow two plants as one.
Growing Foundations
Sweet peppers like a rich, loamy soil that drains well. They also like to stay moist, but not overwatered. You also do not want your soil to become too dry, so find a sweet happy spot.
Ideal temp is 70-90 degrees. If it gets too hot or cold, the plant will cease to produce much fruit.
Harvesting Sweet Peppers
The longer the pepper is left on the plant, the sweeter it gets. You can pick sweet peppers when they are a little greener if you like the flavor or wait until they get to their proper color.
Harvest peppers when they are firm and full.
Cut with a knife or scissor on the stem. Pulling or twisting off can cause other peppers or flowers to fall off.
Sweet Pepper Tips
You will likely need to stake your plant once fruits start to come on as the plants have shallow root systems and can topple over.
You can place a match head in the planting hole before planting your pepper as they like sulfur.
Swiss Chard
| Exposure: | Sun, partial shade |
| Prefers: | Cool weather |
| Season: | Spring, Fall |
| Hardiness Zone: | 3-10 |
| Temperature Tolerance: | 15-90 degrees F |
| Soil pH: | 6.0-6.4 |
| Days to Maturity: | 60 days |

Starting Swiss Chard from Seed
Swiss chard germinates at a cooler soil temperature – around 50 degrees – but struggles to germinate above 80 degrees. You can start seeds indoors 3-4 weeks before the last frost, or plant directly just after the last frost.
Warmer climates can direct sow seeds 10 weeks before the first frost in the fall.
There are several seeds in each swiss chard pod, so you will have little clusters of seedlings that will need to be thinned before you transplant outside.
Sow seeds ½ inch deep and space 8” apart. Seedlings begin to come up in about 7-14 days.
Growing Foundations
Leafy vegetables enjoy do well with a supplement of nitrogen, amend your soil with a compost or fertilizer.
Turn your soil over to a depth of 8 inches before planting.
Harvesting Swiss Chard
You can cut leaves off a swiss chard and it will keep growing. Harvest leaf stalks when they are young and tender to get the best flavor and to keep the plant propagating produce.
Always take outer leaves first. Once the final harvest comes, shear all the leaves off.
Swiss Chard Tips
If you are planting chard to consume as baby greens, plant your produce much closer to each other (about 6 inches apart) for maximum leaves for your space.
Tomatoes
| Exposure: | Full sun |
| Prefers: | Warm weather |
| Season: | Summer |
| Hardiness Zone: | 5-12 |
| Temperature Tolerance: | 50-90 degrees F |
| Soil pH: | 6.0-6.8 |
| Days to Maturity: | 80 days |

Starting Tomatoes from Seed
It takes some care to start a tomato from seed, and since tomato starts are widely available at the store, you may be wondering why you should start tomatoes from seed.
The main reason to start from seed is because you get a plethora of tomato options that you just won’t get from the nursery. You can also find a multitude of heirloom species in seed so you can seed-save from the tomatoes you grow.
Tomato seeds need to be started in a sterile potting soil mix or a seed starting mix.
Start your tomatoes in a seed tray or biodegradable pots. Tomatoes need a warm and humid environment to start which can easily be accomplished by putting plastic wrap around the top of the pot secured by a rubber band.
Prep your seed starting mix by mixing warm water in it. Let the mixture sit overnight if its having a hard time absorbing the water. The consistency should be spongy and damp, not soggy.
Plant a few tomato seeds 1/8 deep in the damp starting mix and place in a dark and warm location, between 70-80 degrees.
Tomato seeds will germinate within 5-10 days. Once the seedlings emerge, remove plastic wrap and place under grow lights or fluorescent lights (or try a bright sunny window). Tomato seedlings need 12-18 hours a day of light!
Use a spray bottle to water seedlings, and do not overwater. Damp, not soggy.
The best setup for starting tomatoes is in a greenhouse, or even a mini greenhouse.
Now, once you have adult leaves coming on, you need to transplant your tomato seedling to its own individual pot. This is crucial for the seedling to develop strong roots. Plant your seedling all the way up to its leaves as the stem will grow more roots.
Transplant your seedlings outdoors two weeks after the last frost is complete. Temps below 40 degrees will kill tomato plants so time your transplant accordingly.
You must harden your seedlings before the full transplant. The longer the seedling grows inside, the harder it will be for the tomato to survive the transplant. Pluck early blossoms off the transplant. Tomatoes love heat so you can warm the soil that it is getting moved into by covering it with a plastic bag.
Bury your tomato transplant very deep, you can cover the bottom leaves even.
Growing Foundations
Tomatoes like a light, well draining soil that crumbles easily. If your soil has too much clay, try amending with compost to make it lighter and more acidic. Tomatoes do good in sandy soil mixed with potting soil.
Water regularly in the mornings and keep soil moist, not soggy.
Harvesting Tomatoes
We all want that beautiful vine ripened tomato that is a bright, appetizing red, hanging off our plant. However, you want to harvest your tomato when it is about ½ green and ½ pink and let it ripen completely inside.
Raccoons love tomatoes and will gladly eat all your ripened fruit. They even peel the skin off!
Tomato Tips
Add mulch around the bottoms of your plants a couple of weeks in to help contain the moisture.
Turnip
| Exposure: | Full sun |
| Prefers: | Cool weather |
| Season: | Spring, Fall |
| Hardiness Zone: | 2-9 |
| Temperature Tolerance: | 20-80 degrees F |
| Soil pH: | 6.0-6.5 |
| Days to Maturity: | 45-65 days |

Starting Turnips from Seed
Turnips need to be directly sown into the soil as they do not fare well with transplanting. You can start sowing turnips as soon as the soil temp reaches 40 degrees.
Scatter your turnip seeds about and cover with a fine soil no more than ½ inch. Compress the soil lightly and keep moist. Seedlings come about in 7-14 days.
Growing Foundations
Turnips are an easy grower and are low maintenance. They grow quite fast too. They like loose well-draining soil that has been tilled about 12 inches down. Use a soil amendment if your natural soil is too heavy or poor.
Harvesting Turnips
Harvest your turnip roots once they have reached about 2-3 inches in diameter. You can also harvest turnip tops for greens, but don’t take any off until the root is developed.
Turnip Tips
Keep your turnips free of weeds as these will steal water from the developing roots.
Watermelon
| Exposure: | Full sun |
| Prefers: | Warm weather |
| Season: | Summer |
| Hardiness Zone: | 3-11 |
| Temperature Tolerance: | 50-90 degrees F |
| Soil pH: | 6.0-6.8 |
| Days to Maturity: | 80 days |

Starting Watermelon from Seed
You can start your seeds directly outdoors when soil temps have reached 70 degrees. If you have a short, cooler summer, then start your seedlings indoors about 4-6 weeks before desired soil temps.
Sow a few of your seeds 1 inch deep in a sandy soil that has been amended with compost. You can dig out a 12” deep hole and fill with compost, manure, and sand. This will behoove your watermelon greatly!
Planting in mounds really helps to keep the soil warm and give your watermelon plants tons of room to grow.
Growing Foundations
Watermelons need a good even watering until the fruit reaches full size. Cease watering as fruit ripens to avoid the melon bursting and help concentrate the sugars for better flavor.
Harvesting Watermelon
When the curled piece at the top of the watermelon is turning brown, the plant is no longer feeding the melon and harvesting is near. Look for a deadening vine or crack in the stem; these are all indicators that your watermelon is ready.
Another telltale sign is when the melon goes from shiny to dull. You can thump it and see if it sounds hollow, but that is not always foolhardy.
Melon bellies change color when the fruit is ripe.
Watermelon Tips
Watermelon leaves typically wilt in the afternoon sun, which is ok, but if they start wilting before noon then water them immediately.
If night temps drop below 50 degrees regularly, the watermelon flavor will be bland. If temps rise above 90 degrees for several days, the flowers will fall off.
Winter Squash
| Exposure: | Full sun |
| Prefers: | Warm weather |
| Season: | Summer |
| Hardiness Zone: | 3-10 |
| Temperature Tolerance: | 50-90 degrees F |
| Soil pH: | 5.5-6.8 |
| Days to Maturity: | 70-100 days |
Starting Winter Squash from Seed
Although the title says “winter”, winter squashes like the warmth! The seeds will not germinate below 60 degrees.
Squashes need a fair amount of time to develop, so plan your indoor seedlings accordingly. Winter squashes do best planted in the early spring or the height of summer.
You can soak your seeds overnight to soften up the seed for better germination.
Plant your seed 1 inch deep and 6 inches apart. You can also plant on hills. If hilling, space hills about 3-4 apart. Plant a few seeds in a ring formation at the top of the hill.
Growing Foundations
Squashes can develop powdery mildew on their leaves. Avoid this by adding a mulch underneath the plants and watering directly into the plant, avoid getting water on the leaves.
Harvesting Winter Squashes
Winter squash has a tough outer skin in comparison to its summer squash counterparts. They take a while to develop so leave your fruits on the vine until you cannot push your thumbnail into its skin.
Clip the fruit off the vine and allow to sit in the garden for 1-2 weeks. You can also put them on a sunny windowsill for two weeks.
Winter Squash Tips
Winter squashes can store for 3-6 months in a cool dark place, such as a pantry. Do not wash the squash; rather, rub any soil or dirt off with a cloth and keep dry.
Welcome to my ultimate heirloom seed planting guide!
In this (very long) article, you will find out how to plant almost all species of crop from heirloom seed.
I also go over tons of tips and tricks for the best possible outcome that you can give your vegetable garden to thrive.
Planting with a good foundation of knowledge will behoove the output of your garden. Every plant is different and requires a multitude of variations which can be difficult to achieve. However, if you follow the basics, your plants should be happy and provide a bounty of fruits and veggies.
I have also compressed all of this information into a printer-friendly planting guide PDF (so you can have a physical copy to store with your survival seed pack.
Download Printable PDF Guide HerePlease refer to the table of contents to navigate through this article as there is a lot of information. Also, don’t forget to bookmark!
And one more thing. If you don’t see the vegetable or fruit your looking for, please drop me a comment and I will add to both the article and the PDF.
Enjoy!
Artichoke
Exposure: | Full sun, partial shade |
| Prefers: | Cooler weather |
| Season: | Spring, Fall |
| Hardiness Zone: | 3-11 |
| Temperature Tolerance: | 20 degrees F |
| Soil pH: | 6.5-7.0 |
| Days to Maturity: | 85-100 days |
Starting Artichoke from seed
You can start artichoke seeds indoors about 2 months before your last frost date. You will have artichoke fruits midsummer thru fall. The seeds need temps in the low 70s to germinate and will sprout in about 2-3 weeks.
Growing foundations
Artichokes prefer cool damp climates and need moist well draining soil to perform well. They grow very well in Northern California temps. Artichokes are quite hardy and can fair well in freezing climates if well mulched. Artichokes are a perrenial and will keep producing for years if not frozen out over the winter or overheated in the summer.
Plant your artichoke seeds about 1/2 inch deep and space 6 inches apart.
Harvesting Artichoke
Harvest the artichoke while is is a full bud, if you do not harvest it, it will become a huge purple beautiful thistle flower!
Artichoke tips
You can plant artichokes as annuals if your climate does not agree with the plant year around. Asparagus make a great companion plant!
Arugula
| Full sun, partial shade | |
| Prefers: | Cooler weather |
| Season: | Spring, Fall |
| Hardiness Zone: | 3-11 |
| Temperature Tolerance: | 45-65 degrees F |
| Soil pH: | 6.0-7.0 |
| Days to Maturity: | 40 days |
Starting Arugula from seed
Arugula is an easy grower and you can start to plant as soon as the spring soil is fully thawed. Plant your seeds directly in the soil, cover them lightly, and water them down gently.
Plant seeds no more than ¼ inch deep in rows. Space the seeds an inch apart. You can also cast the seeds over an area and then thin the seedlings to be 3-4 inches apart.
The seed will begin to germinate around 7 days.
Once the plants have sprouted some true leaves, thin them to about 4 inches apart. This will help reduce overcrowding and risk of disease.
Growing foundations
Arugula has shallow roots, so you need to keep them consistently well-watered. Avoid watering the leaves to reduce the chance of mildewing.
Arugula prefers nitrogen rich soil; if your soil is not nitrogen rich, you can easily amend some fertilizer in. Arugula does good with a fair deal of sun, but you can plant them in part shade to reduce sun damage and bitterness in warmer temps.
Harvesting Arugula
Arugula is a quick grower and can be harvested in about 40 days. When you do harvest, pinch off the outer older leaves as the plant will keep producing more leaves.
The more you harvest, the more produce the plant will grow.
Arugula tips
Arugula’s flavor will get stronger the more you harvest and the warmer it gets. It will turn more bitter as the summer heat grows.
If your Arugula begins to melt in the hot summer sun, cover with shade tents for relief.
Plant in early spring and late summer for two harvests. You can also plant all season long, every two to three weeks, for continual produce.
Beans, Bush
| Exposure: | Full sun |
| Prefers: | Warm weather |
| Season: | Summer |
| Hardiness Zone: | 3-10 |
| Temperature Tolerance: | 70-85 degrees F |
| Soil pH: | 6.0-7.0 |
| Days to Maturity: | 55-60 days |
Starting Bush Beans from Seed
Sow your bush bean seeds directly into the soil as they do not handle transplanting well. They like the warmth and will germinate nicely between 65-75F.
Plant your beans about one inch deep and space 4 inches between them. Make sure to cover with soil and tamp down. Keep your rows 18” to 24” apart.
Growing foundations
Bush beans grow to about 2 feet, blossom, provide a single harvest, and then die. Therefore, you can plant throughout the season for a continuous harvest. Make sure to plant your final crop 8 weeks before the first frost.
Bush beans do well in most soil types but do like a well-draining organic rich soil. You can amend with compost to add in more organic matter.
Harvesting bush beans
Pluck beans when they are about 3-5 inches long and before you can see the outline of the inner beans. If you would like dry beans, let them dry on the vine for weeks.
Bush bean growing tips
If you are growing bush beans several years in a row, make sure to rotate your planting area every year as this will prevent diseases from killing the seedlings.
Bush beans collect nitrogen from the air, so don’t rely on nitrogen-rich fertilizer. Rather, they like compost and organic matter better.
Beans, Pole
| Exposure: | Full sun |
| Prefers: | Warm weather |
| Season: | Summer |
| Hardiness Zone: | 3-10 |
| Temperature Tolerance: | 70-85 degrees F |
| Soil pH: | 6.0-7.0 |
| Days to Maturity: | 65-70 days |
Starting Pole Beans from Seed
Pole beans need quite a bit more space than their bush bean counterparts, so plant your beans 6 inches between plants. Plan for 3 feet between bean rows.
Plant beans at a depth of one inch and cover completely and tamp down. Make sure temperature in the soil is at or above 65F for proper germination.
Growing Foundations
Pole beans need support from a structure (hence “pole”) and do well growing up lattices, fencing, or any type of natural support that they can vine up.
Pole beans get significantly bigger than their bush cousins.
Harvesting Pole Beans
You will be harvesting your pole beans within 60 days. Pick them when they are nice and plump but don’t wait too long or they can become bitter.
If you want dried beans, let them dry on the vine for weeks.
Pole Bean Tips
Pole beans can get infested with beetles; spray a light mist of soapy water to deter them.
One nice thing about pole beans is that you can harvest them upright, giving your back a break!
Beets
| Exposure: | Full sun |
| Prefers: | Cool weather |
| Season: | Spring, Fall |
| Hardiness Zone: | 2-10 |
| Temperature Tolerance: | 50-85 degrees F |
| Soil pH: | 6.5-7.5 |
| Days to Maturity: | 60 days |
Starting Beets from Seed
Beets can be hard to germinate as their seeds have a hard exterior. The best thing to do is soak them for at least a half hour before planting.
Some have had success transplanting seedlings, but I recommend planting directly in the soil.
Plant your beet seeds about ½ inch deep and 1 inch apart. Thin to 3-4 inches apart when seedlings reach 4 inches tall or so. Leave 12 inches between rows.
Growing Foundations
Beets do good in crappy soil so don’t worry about fertilizer.
Beets like cool weather but they also like bright sun, so if you can nail this combo you will have beautiful large happy beats.
Harvesting Beets
You can harvest the beet early or late, but if you want the classic 2 inch size beet, then harvest around 65 days. If you wait to long to harvest, the roots become fibrous.
Separate the tops from the beet so the greens don’t suck out the moisture of the beet.
Beet Tips
Many people have never had fresh beets, only canned or pickled. Fresh beets have such a good flavor, so give beets another chance! Try slicing them and putting them directly on the grill.
Beet green are very good to eat! Pick some off while the beet plant is young.
Broccoli
| Exposure: | Full sun, partial shade |
| Prefers: | Cool weather |
| Season: | Spring, Fall |
| Hardiness Zone: | 3-10 |
| Temperature Tolerance: | 45-85 degrees F |
| Soil pH: | 6.0-6.8 |
| Days to Maturity: | 50 days |
Starting Broccoli from Seed
Broccoli seeds will germinate in temperatures as low as 40F and they do love the cooler weather. Broccoli prefers organically rich slightly acidic soils.
You can start your seedlings indoors and have them ready to plant immediately after the last frost. Start them indoors 8 weeks prior to last frost. Move your seedlings outdoors when they are six inches tall.
Plant broccolis 12-18 inches apart and space rows 36 inches apart. If you are planting for fall harvest, sow seeds outdoors 100 days before the first fall frost.
Growing Foundations
Hot summer heat can ruin the flavor of your broccoli as full sun will encourage flowering. You can deter this by growing in partial shade or planting in the fall for hotter climates.
Apply a nice thick layer of mulch to keep the ground cool and your broccolis happy.
Harvesting Broccoli
Pick your broccoli when the heads are fully formed and are about 6 inches across, give or take. Pick before they yellow as that indicates flowering.
Cut the stalk lower than what you see at the grocery store and cut it at a slant.
Broccoli Tips
Smaller side shoots will grow where you cut your broccoli, amend your plants with some fertilizer to give them a boost.
Brussels Sprouts
| Exposure: | Full sun |
| Prefers: | Cool weather |
| Season: | Spring, Summer |
| Hardiness Zone: | 2-9 |
| Temperature Tolerance: | 45-80 degrees F |
| Soil pH: | 6.0-6.8 |
| Days to Maturity: | 90-115 days |
Starting Brussels Sprouts from Seed
I suggest starting your seeds indoors about 6 weeks before the last Spring frost, about ½ inch deep. Move them to the outside when they are 3 inches. Plant your sprouts 14-18 inches apart, and the seedlings about ¼ inch deep.
Growing Foundations
Brussels sprouts have quite a long growing season and are not too happy with hot weather. That being said, Southern gardeners may be able to squeak out a fall crop.
Brussels sprouts like to be fed so plan to feed them once a month for two months.
Harvesting Brussels Sprouts
Start by picking the orbs when they are firm and deep green. Harvest the ones from the bottom up as those ripen first.
Twist or snap off the little cabbages from the stalk.
Brussels Sprouts Tips
Remove lower leaves to quicken the development of the sprouts.
A little bit of frost can enhance the flavor of your brussels sprouts. Make sure to pick before they yellow as they become bitter.
Cabbage
| Exposure: | Sun, partial shade |
| Prefers: | Cool weather |
| Season: | Spring, Fall |
| Hardiness Zone: | 2-9 |
| Temperature Tolerance: | 45-80 degrees F |
| Soil pH: | 6.5-6.8 |
| Days to Maturity: | 90 days |
Starting Cabbage from Seed
Start your cabbages indoors about 6-8 weeks before the last expected frost, but plant them outdoors 2 weeks before the actual last expected frost! Make sure to harden them off before transplanting. They should be about 4 inches tall for transplanting.
Plant your cabbages about ¼ inch deep and leave 18 inches between each plant.
You can also seed directly into the soil once your soil has thawed out.
Growing Foundations
Cabbages are hungry and need compost or manure amended into your soil prior to planting. Keep adding nitrogen as heads form to keep them pumped up.
Keep your soil moist to prevent head splitting. Head splitting can happen from too much rain than being too dry. It can also happen by too much fertilizer at the end of their growing season.
Harvesting Cabbages
Wait to harvest cabbage until the head is nice and firm throughout.
Cut the cabbage at the base with a sharp knife.
Cabbage Tips
Use a shade cover to keep cabbages from overheating during the hot summer months. Cabbages do prefer cooler weather.
Carrots
| Exposure: | Sun, partial shade |
| Prefers: | Cool weather |
| Season: | Spring, Fall |
| Hardiness Zone: | 3-10 |
| Temperature Tolerance: | 50-85 degrees F |
| Soil pH: | 6.0-6.8 |
| Days to Maturity: | 65 days |
Starting Carrots from Seed
You will need to direct sow your carrots seeds into your soil as they do not tolerate transplanting whatsoever. Luckily, they are an easy sprouter and you will see your carrots coming up within 3 weeks or so.
Carrots like a sandy type soil and will need room to grow down, so till your area to be free of roots and rocks to about 12” deep.
Carrot seeds are teeny tiny but you will want to give them a good couple of inches apart from each other. Plant them shallow, only 1/8 to ¼ deep.
If your carrots become overcrowded, trim the excess carrot tops as pulling them out could cause damage to neighboring carrots.
Water your seeds in lightly once sowed.
Growing Foundations
If your carrots grow fat and round, your soil has not been loosened up enough before planting. Carrots actually do well in containers which is helpful to managing soil.
Carrots do not like too much nitrogen so be careful adding in hot manure or anything nitrogen rich. Carrots also require some phosphorus which can be amended in via bone meal.
Harvesting Carrots
Easy! Pull the carrot out by the top. Loosen the dirt around the carrot if its too tight to pull out.
You can tell when your carrots are ready to harvest when the top of the carrot bulges out of the ground and is about a half inch thick. If you do not see the top of the carrot, brush away the soil to check.
Carrot Tips
Make sure to harvest carrots before bolting – before the plant starts flowering and seeding.
Carrots like cold weather and appreciate a good frost; it will bring out the sweet flavor of the carrot.
Cauliflower
| Exposure: | Full sun |
| Prefers: | Cool weather |
| Season: | Spring, Fall |
| Hardiness Zone: | 2-11 |
| Temperature Tolerance: | 45-85 degrees F |
| Soil pH: | 6.0-7.0 |
| Days to Maturity: | 80 days |
Starting Cauliflower from Seed
You will want to start your cauliflower from seed indoors, between four to six weeks before that last frost date. Sow them about a ¼ inch deep into bio pots that will disintegrate when you plant them. This will avoid root disturbance.
You will want to keep your seedling soil at 70 degrees with a seedling heat mat for best results. Place them in a sunny window and keep the soil moist.
Once your seedlings have developed adult leaves, you can transplant them. Take care to harden them off.
Keep your cauliflowers apart 18-24 inches.
Growing Foundations
Cauliflower needs a soil pH between 6.0-7.0, 6.5-6.8 is even more ideal.
Cauliflower grow best in cool weather so although they need full sun, if you place them in a partial shade area in warmer climates, it can protect them from a spike in temperature.
You will want to keep your cauliflower evenly moist; do not let the plant dry out. You can add some mulch around the plants to keep in moisture and keep out too much heat.
Harvesting Cauliflower
Cut the heads off by the stem with a knife. You can keep some leaves on as those are edible and tasty.
You know your cauliflower is ready when the heads are firm and compact. Expect the heads to be close to 6 inches in diameter, but harvest if the heads are ready to go if they do not get to that diameter.
Cauliflower Tips
Cauliflower can be tricky to grow and if not grown properly it can result in the curds being fuzzy. Follow the climate, soil, and moisture conditions for best results.
When the cauliflower head reaches 2-3 inches in diameter, you will want to blanch the leaves to attain the whitest curds. Blanching is covering the exposed head with the plant’s own leaves. Gather the leaves around the head and bind with twine or a rubber band.
Peak in on your cauliflower every couple of days and harvest once ready.
Celery
| Exposure: | Full sun |
| Prefers: | Cool weather |
| Season: | Spring, Fall |
| Hardiness Zone: | 4-10 |
| Temperature Tolerance: | 50-70 degrees F |
| Soil pH: | 6.0-6.5 |
| Days to Maturity: | 120 days |
Starting Celery from Seed
Celery seed needs direct sunlight to grow but does best starting indoors then transplanting. An LED grow light is an efficient, low cost lighting method to starting seedlings indoors. Start your seeds 8-10 weeks before your last average frost. Lay in 2-3 seeds per seedling pod, but do not push into the soil.
Celery seed is extremely tiny, but you do not want to have too many seedlings in one pod. You can dampen the end of a toothpick to pick up the tiny seeds and scrape into the soil.
Germination can take up to 18 days. Make sure to harden your seedlings before fully transplanting. Plant your celeries 12 inches apart.
Growing Foundations
Celery does not like too hot of weather and needs to stay cool. For warmer climates, a fall sowing will fare better than a spring sowing.
Celery does not like sand or clay and needs super rich compost-like soil to perform its best.
Celery takes a long time to grow so prepare to keep your plants cool and give them care.
Harvesting Celery
You can harvest the entire plant at once or just harvest the outer stalks. Cut at the base fully with a large sharp knife for the whole plant. Once the stalks are a minimum of 6 inches, you can harvest them, or wait until they grow larger.
Celery Tips
You may want to blanch your celery so your produce doesn’t end up bitter. When the celery has doubled in size, bring up the soil to cover its base. That will keep the stalks white and tasty. You can also blanch the upper portion of the celery by binding the top with a rubber band.
Collard Greens
| Exposure: | Sun |
| Prefers: | Cool weather |
| Season: | Spring, Fall |
| Hardiness Zone: | 2-10 |
| Temperature Tolerance: | 30-80 degrees F |
| Soil pH: | 6.5-6.8 |
| Days to Maturity: | 75 days |

Starting Collard Greens from Seed
You can start seedlings indoors during the spring or fall and keep the soil temp at 70 degrees. I recommend direct sowing at 1/2 inch deep with 30 inches in between plants. Collard greens get very large so give them lots of space!
Growing Foundations
Collard greens are a cool weather crop and do well with a bit of frost. They can withstand very cold temps, but will not do well with wild temperature fluctuations.
Collards are a brassica and can be grown with the same methods.
Harvesting Collard Greens
You can harvest the whole plant when the plant leaves have turned a deep green. Alternatively, you can harvest leaves while leaving the buds on the plant, allowing them to grow.
Collard Green Tips
Wrap the harvested leaves in a moist paper towel within a perforated plastic bag to allow for maximum storage life.
Corn, Sweet
| Exposure: | Full sun |
| Prefers: | Warm weather |
| Season: | Summer |
| Hardiness Zone: | 4-8 |
| Temperature Tolerance: | 70-90 degrees F |
| Soil pH: | 5.8-6.8 |
| Days to Maturity: | 90 days |
Starting Corn from Seed
Corn is a warm weather lover and your soil needs to be at least 60 degrees before sowing seeds.
Place 2-3 seeds in holes about a half inch deep. Keep your corns about 12 inches apart. Thin your seedlings to only one per hole and choose the strongest sprout. Keep your rows 36 inches apart.
You can speed up the germination process and success by soaking your corn seeds overnight.
Growing Foundations
Corn needs nitrogen to grow and will do best if nitrogen rich compost or manure is amended to the soil before planting.
Keep your corns nice and moist as they require good watering to grow properly.
You will want to feed your corns with a fertilizer rich in nitrogen when your plants are 12-18 inches.
Harvesting Corn
Harvest when the corn silks become a light brown and the corns feel plump when squeezed. You can also pull down the leaves from the top and check the top kernels, they should be firm, plump, and milky.
Bend and pull the ear in a down motion from the stalk while twisting.
Corn Tips
For home growers, plant your corn in a square as opposed to a row for better pollination between the tassels. Corn is wind pollinated so the success of pollination becomes much higher when in a square formation.
If you are growing more than one variety of corn, keep species apart by at least 500 feet or vary growing times to avoid cross pollination.
Cucumber
| Exposure: | Full sun |
| Prefers: | Warm weather |
| Season: | Summer |
| Hardiness Zone: | 4-12 |
| Temperature Tolerance: | 65-85 degrees F |
| Soil pH: | 6.0-7.0 |
| Days to Maturity: | 65 days |
Starting Cucumber from Seed
Directly sow your cucumber seeds a month after the last frost in the spring. You can also start them indoors 4-6 weeks before the last frost, use a grow light and plant in a seed starting soil mixture.
Plant your seeds a half inch apart and give your cucumbers plenty of space. They do well in hills spaced 18 inches apart.
Germination takes approximately 10 days when temps are around 70 degrees.
Growing Foundations
Cucumbers love nitrogen and will need a good side dressing of compost, manure, or fertilizer once a month. If your cucumber leaves yellow, they are probably not getting enough nitrogen.
Do not let your soil dry out completely. You can accomplish this with a nice layer of mulch.
Harvesting Cucumbers
Pick your cukes before they have fully matured as the fruit gets very seedy once they have grown to their biggest size, which is about 6-8 inches.
Pick them off by cutting with a knife, as pulling them off can damage the vine.
Cucumber Tips
Cukes do well growing vertically on a trellis or in a raised bed, or even in a pot! This also helps prevent mildewing.
Higher temps produce more male flowers which will appear first and fall off. You can circumvent too high of heat by placing a shade over the plant.
Eggplant
| Exposure: | Full sun |
| Prefers: | Warm weather |
| Season: | Summer |
| Hardiness Zone: | 5-12 |
| Temperature Tolerance: | 65-85 degrees F |
| Soil pH: | 5.5-6.0 |
| Days to Maturity: | 75-80 days |
Starting Eggplant from Seed
Eggplant seeds require warm soil from 60-85 degrees to germinate and take a good long while to harvest so you will likely have to start your seed indoors.
Start your seedlings indoors 8-10 weeks before your expected last frost into spring. Keep your seedlings nice and moist and warm. This can be done by placing plastic wrap over them and with a heating mat. Seedlings will come up within 7-14 days. Once sprouted, place them under grow lights or by a bright window.
Plant your seeds ¼ inch deep and space your plants 18-24 inches apart. Harden off seedlings before transplanting.
Growing Foundations
Eggplants love hot weather and fare well over 70 degrees. Any temps below that and you will see a noticeable dip in their overall happiness.
Raised beds and pots are ideal as the temps of the soil warm up quicker than in the ground.
One Black Beauty eggplant plant will yield about 4-6 fruits. Fruits can get very large and can weigh as much as 1-3 pounds.
Harvesting Eggplant
Harvest when the skin of the eggplant is glossy. Simply cut with shears at the stem.
Eggplant Tips
Although eggplant loves heat, temps above 95 degrees will cause plants to stop setting fruit. Water liberally when fruits are developing.
Stake your eggplant to give it support while fruiting.
Hot Peppers
| Exposure: | Full sun |
| Prefers: | Warm weather |
| Season: | Summer |
| Hardiness Zone: | 4-11 |
| Temperature Tolerance: | 60-85 degrees F |
| Soil pH: | 6.0-6.8 |
| Days to Maturity: | 75-85 days |
Starting Hot Peppers from Seed
Peppers love a warm and dry climate and need soil to be at least 70 degrees for germination. Plant three seeds to one hole and thin to two plants once sprouted; the two will grow as one plant.
Start your peppers inside 8-10 weeks before your last frost date and only transplant once your soil is consistently staying at 65 degrees.
Space plantlings 18-24 inches apart.
Growing Foundations
Peppers are typically pest tolerant but can succumb to mildews. The bulk of their produces comes in when the temps start to cool down at night.
Peppers like their soil to be warm and moist for the best results. Avoid high nitrogen fertilizers; this will cause leafy plants with few fruits. Instead, use an aged compost for nutrients.
Harvesting Peppers
Harvest peppers by cutting off the stem once they are firm, full, and of the appropriate color. You can also harvest hot peppers when green for a different flavor and less heat.
Hot Pepper Tips
You can dry your overabundance of hot peppers using a food dehydrator allowing the fruit to fully dry.
If your flowers are dropping before fruiting, it could be caused by too high of temps and high winds.
Kale
| Exposure: | Full sun |
| Prefers: | Cool weather |
| Season: | Spring, Fall |
| Hardiness Zone: | 2-9 |
| Temperature Tolerance: | 20-80 degrees F |
| Soil pH: | 5.5-6.8 |
| Days to Maturity: | 60 days |
Starting Kale from Seed
Plant your kale in the spring and again in the fall for a double harvest. Sow your seeds directly outside after the last frost. Sow seeds again in August or September for a double harvest.
Plant seeds ½ inch deep and thin to 8-12 inches apart.
Growing Foundations
Kale loves the cool weather and will become bitter as the weather gets hotter. Do not overwater your kale but keep the watering consistent.
If you mulch heavily after the first freeze, you may be able to keep your kale going throughout winter.
Harvesting Kale
Pick the leaves towards the outside of the plant and only pick a handful at a time so you can keep your plant growing and productive.
Do not pick the center terminal leaves, if you do, the plant will stop producing.
Kale Tips
Kale will keep growing all the way down to 20 degrees. A frost will sweeten up your kale.
Lettuces
| Exposure: | Sun, partial shade |
| Prefers: | Cool weather |
| Season: | Spring, Fall |
| Hardiness Zone: | 4-9 |
| Temperature Tolerance: | 20-80 degrees F |
| Soil pH: | 6.0-6.5 |
| Days to Maturity: | 30-70 days |
Starting Lettuces from Seed
The sweet spot for planting lettuce seeds is in between 50-80 degrees.
You will want to direct sow your lettuces straight into the ground by means of sprinkling. Cover your seeds with a thin layer of soil. You will see your lettuces sprouting from 7-10 days. Plant your seeds 4 weeks before the last frost. Seeds can also be planted in late summer.
Once your seedlings come up, start to thin to the tune of 4 inches for leaf, 6 inches for loose heads, and 16 inches for firm heads.
Growing Foundations
Temps above 80 degrees will cause your lettuce to become bitter.
Lettuces grow rather easily, and soil prep is simply done with compost, manure, or potting soil.
Lettuce plants have a shallow root system and need a steady supply of water.
Harvesting Lettuces
Do not wait for your lettuce to be fully mature. You can begin harvesting as early as 30 days in for baby lettuce leaves. Pick the outer leaves and keep the inner terminal leaves growing for continued harvesting.
Butterheads and Romaines can be cut entirely.
Lettuce Tips
You can try to overwinter your lettuces by protecting your fall crop with a thick bed of mulch or straw to keep in heat. If it gets too cold, the lettuce will go dormant, but should keep growing down into the 20s.
Melon
| Exposure: | Full sun |
| Prefers: | Warm weather |
| Season: | Summer |
| Hardiness Zone: | 3-11 |
| Temperature Tolerance: | 50-95 degrees F |
| Soil pH: | 6.0-6.5 |
| Days to Maturity: | 90 days |
Starting Melon from Seed
Melons like it warm and need the soil to consistently stay above 70 degrees. Colder climates will have a better chance of bringing their melons to fruition if started indoors. Keep your melon indoors until the appropriate soil temp has come about.
Plant your melon down 1 inch deep and keep your spacing from at least 24-36 inches. Melons will take as much room as you give them and even more by climbing up and over things.
Growing Foundations
Melons sprawl out and need lots of space for their vines and fruits. They also love sandy soil and will propagate extremely well in sandy conditions. If you do not have sandy conditions, you will need soil that drains very well. Think about amending some sand into your plot.
You do not want to overwater your melons once the fruit is coming on as it could cause the melons to burst. Rather, water just enough to keep the leaves perky.
Harvesting Melons
Your melon is ready when it is easy to pull from the vine but not quite falling off. The vine may be dead or browning at this point.
The melon is ready when you can get a good thump out of it.
Melon Tips
You can place some old cardboard or mulch under your melon vines and fruits to avoid mildews and rot.
Making a mound for your seedling is a good way to separate plants with plenty of room.
Okra
| Exposure: | Full sun |
| Prefers: | Warm weather |
| Season: | Summer |
| Hardiness Zone: | 6-11 |
| Temperature Tolerance: | 60-85 degrees F |
| Soil pH: | 6.5-7.5 |
| Days to Maturity: | 60 days |
Starting Okra from Seed
Soil needs to be around 65-70 degrees so either start your okra indoors four weeks before the last frost or direct sow in the spring.
Soak your seeds in room temperature water overnight for better germination success.
Plant your seed ¼ inch deep and 12 inches apart. Once the plants get larger, you can thin them to 3-4 feet apart.
Growing Foundations
Okra likes a well-drained soil that is fertile and is not too picky about soil types, as long as it drains off good.
Make sure to plant your okra in full sun.
Harvesting Okra
Your first harvest should be around the two month mark. Okra will continue to produce more okras every few days. Cut the okra above the cap of the fruit.
Okra Tips
Wear gloves while handling okra as it has tiny spines which can cause skin irritation.
For faster okra produce, cut the leaves off the lower part of the plant after the first harvest.
Onion
| Exposure: | Full sun |
| Prefers: | Cool weather |
| Season: | Spring, Summer |
| Hardiness Zone: | Varies |
| Temperature Tolerance: | 40-80 degrees F |
| Soil pH: | 5.5-6.5 |
| Days to Maturity: | 95-165 days |
Starting Onion from Seed
Usually, onions are grown from sets, or tiny little onions sold in a bag. However, you have access to many more varieties from seed.
You will want to start your onion from seed indoors. You can start your onions about 8 to 10 weeks before your last frost.
You can also start onions outdoors if you live in a warm climate and the soil is above 68-75 degrees, but indoor starts are recommended.
Transplant your seedlings when they are 4-6 inches tall and 2-3 inches apart.
Growing Foundations
There are short-day, intermediate-day, and long-day onions. Short onions do better in warmer climates from zone 7 and on. Zone 5 and 6 will be able to have a good short-day onion season. Zone 6 and colder will have a better chance with long-day onions.
Onions like a rich and organic soil. Amend your plot with compost or manure and fertilizer.
Harvesting Onions
When onion tops start flopping over and turning brown, onions are ready to harvest.
You will see the crown of the onion poking out of the ground.
Simply pull the onion out of the ground by its top.
Onion Tips
Onions want nitrogen so be prepared to feed your onions with a high nitrogen fertilizer every two weeks or so. Chicken manure is a good choice for a high nitrogen option.
Pea
| Exposure: | Full sun |
| Prefers: | Cool weather |
| Season: | Spring, Fall |
| Hardiness Zone: | 2-9 |
| Temperature Tolerance: | 30-75 degrees F |
| Soil pH: | 6.0-7.5 |
| Days to Maturity: | 60 days |
Starting Peas from Seed
Soil needs to be warmer than 45 degrees, so plant your peas directly outside 4-6 weeks before the last frost comes.
Plant your peas 1 inch, in full sun, and six inches apart. Space your rows 12 inches apart.
Pea seeds are light so if they start to float to the top, poke them back into the ground gently with a pen.
Growing Foundations
Peas do not like temps warmer than 85 degrees, so if you are in a warmer climate, you will want to get these guys in the ground as early as possible.
Peas like sandy, well-draining soil and will pretty much grow in anything except for thick clays.
Peas collect their own nitrogen, so you don’t need to supplement them.
Harvesting Peas
Your peas are ready to harvest once the pods swell and are still tender.
Pick the peas off by hand and gently to avoid damaging the vine.
The more peas, you pick, the more pea pods the plant will produce, so keep on picking!
Peas Tips
Make sure to water your peas abundantly when the pods are forming. At least an inch a week of rain will suffice, but supplement with more water if needed.
Pumpkin, Sugar
| Exposure: | Full sun |
| Prefers: | Warm weather |
| Season: | Summer |
| Hardiness Zone: | 3-9 |
| Temperature Tolerance: | 50-85 degrees F |
| Soil pH: | 5.5-7.5 |
| Days to Maturity: | 100 days |
Starting Sugar Pumpkin from Seed
Pumpkins need a whole lot of room to grow, think of a pumpkin patch as a kid! Plan on a space of around 20 square feet per plant. This can be achieved on the edge of a garden or some outlying area on your property.
Soil temp needs to be 65 degrees or higher for germination and it takes a good while to reach fruition so plan accordingly depending on your growing zone.
Make mounds and plant 3-5 pumpkin seeds per mound. Poke your seeds in 1 inch deep. Once your seedlings are shooting up, thin to only 2 seeds and leave to grow.
Growing Foundations
Pumpkins require a lot of water but do not need watering frequently. Rather, water your pumpkin when the leaves and vines are looking limp. Give it a good long drink. Infrequent, deep watering will result in a healthy pumpkin plant.
Pumpkins like a rich loamy soil that drains decently well. Pumpkins do not fare well in water logged muddy soil.
Harvesting Sugar Pumpkin
Pick your pumpkin when the color is a proper orange and you get a good thump. Cut the pumpkin off at the stem with a knife.
Sugar pumpkins get about 10 inches in diameter.
Sugar Pumpkin Tips
If you want to enjoy your sugar pumpkin for Halloween or Thanksgiving (pumpkin pie) then count backwards 100 days from when you want to have them ready by.
Radishes
| Exposure: | Full sun |
| Prefers: | Cool weather |
| Season: | Spring, Fall |
| Hardiness Zone: | 2-10 |
| Temperature Tolerance: | 40-75 degrees F |
| Soil pH: | 5.6-7.0 |
| Days to Maturity: | Varies |
Starting Radish from Seed
Once the soil is workable, you can sow your radish seeds straight into your garden as they tolerate soil temps as low as the 40 degree range. Their best germination happens at 55-70 degrees, however.
Plant your seeds ¼ inch deep and 1-3 inches apart. The larger winter variety radishes require ¾ inch sowing with six inches between seeds.
Growing Foundations
Radishes are very easy to grow and will grow fine in most soil types, although they enjoy sandy soil the most. You can amend your soil with fertilizer, if you like.
Radishes grow so quickly and easily, you won’t have to fuss much over pulling weeds.
Harvesting Radishes
You need to harvest your radishes at the proper time as the flavor and texture will deteriorate and become woody.
Radish Tips
Radishes are a good repellant for pests and make good companion planters for other more pest vulnerable crops.
You can do so much more than just having some radish slices on a salad. Try pickling radishes or roasting radishes up like diced potatoes!
Spinach
| Exposure: | Sun, partial shade |
| Prefers: | Cool weather |
| Season: | Spring, Fall |
| Hardiness Zone: | 2-9 |
| Temperature Tolerance: | 30-75 degrees F |
| Soil pH: | 7.0 |
| Days to Maturity: | 45 days |
Starting Spinach from Seed
You can direct sow spinach from seed straight into the soil once it becomes workable in the Spring.
Sow your seeds ½ inch deep and gently compress into the soil, water lightly.
You will see the seedlings begin to emerge from 7 to 14 days.
Once your seedlings have reached 1-2 inches, thin them to be about 5 inches apart.
Growing Foundations
Spinach is one of the few species that likes a neutral to alkaline soil, however it fares well in most soil types.
Plants need to be well watered during dry spells, aim for an inch of water per week, either from rain or from watering.
Harvesting Spinach
The larger the leaves get, the more bitter the spinach will become. So, pluck off your produce sooner than later. You can pinch off outer leaves or take the whole plant. I personally enjoy baby spinach; when harvesting the baby leaves, leave enough on the plant so it can keep photosynthesis going.
Spinach Tips
Spinach enjoys some shade, freeing up space for your full sun crops. The plant will bolt if it becomes too hot, so plant in early spring and late summer when it starts to cool down for a fall crop.
Summer Squash
| Exposure: | Full sun |
| Prefers: | Warm weather |
| Season: | Summer |
| Hardiness Zone: | 3-10 |
| Temperature Tolerance: | 60-95 degrees F |
| Soil pH: | 5.5-6.8 |
| Days to Maturity: | 45-60 days |
Starting Summer Squashes from Seed
You can start your squashes indoors 3-4 weeks before transplant time. Summer squashes want soil to be 70 degrees or hotter before you direct sow or transplant, so plan accordingly. You will see your plants coming up within 8-14 days.
Sow summer squash seeds ½ inch deep at a spacing of 6 inches apart. Rows need to be 4-6 feet apart.
Growing Foundations
Summer squashes are heavy feeders and need a well draining, well fertilized, rich soil. Keep fertilizing your squashes as they keep growing.
Squashes love water so prepare to water once in the morning and again in the afternoon as summer temps heat up.
Harvesting Summer Squashes
Most squashes start losing their flavor after 4-5 inches in length so harvest early and often.
Cut your fruit off with a knife where it naturally separates from the plant; do not pull or twist off as this can cause damage to the plant.
Summer Squash Tips
You can eat the blooms as they are quite tasty. Just make sure to not over-harvest the blooms as they are needed to pollinate and produce more fruits!
Sweet Pepper
| Exposure: | Full sun |
| Prefers: | Warm weather |
| Season: | Summer |
| Hardiness Zone: | 9-11 |
| Temperature Tolerance: | 60-95 degrees F |
| Soil pH: | 6.0-6.8 |
| Days to Maturity: | 75-100 days |
Starting Sweet Peppers from Seed
Sweet peppers, especially bell peppers, need a long time to grow and summer heat, which can be tricky for colder climates. You will need to start your seeds indoors to compensate for a shorter, cooler summer.
Seeds need a soil temperature of 80 degrees to germinate, so plant on starting your seeds inside 6-8 weeks before the last frost date.
Peppers require hardening before transplanting outside, so bring them up to outdoor speed slowly before planting in the ground. Remove any blossoms the plant has before transplanting.
Plant at ¼ inch deep and space 12-18 inches apart. Plant three seeds at a time and then pluck out the weakest seedling to grow two plants as one.
Growing Foundations
Sweet peppers like a rich, loamy soil that drains well. They also like to stay moist, but not overwatered. You also do not want your soil to become too dry, so find a sweet happy spot.
Ideal temp is 70-90 degrees. If it gets too hot or cold, the plant will cease to produce much fruit.
Harvesting Sweet Peppers
The longer the pepper is left on the plant, the sweeter it gets. You can pick sweet peppers when they are a little greener if you like the flavor or wait until they get to their proper color.
Harvest peppers when they are firm and full.
Cut with a knife or scissor on the stem. Pulling or twisting off can cause other peppers or flowers to fall off.
Sweet Pepper Tips
You will likely need to stake your plant once fruits start to come on as the plants have shallow root systems and can topple over.
You can place a match head in the planting hole before planting your pepper as they like sulfur.
Swiss Chard
| Exposure: | Sun, partial shade |
| Prefers: | Cool weather |
| Season: | Spring, Fall |
| Hardiness Zone: | 3-10 |
| Temperature Tolerance: | 15-90 degrees F |
| Soil pH: | 6.0-6.4 |
| Days to Maturity: | 60 days |
Starting Swiss Chard from Seed
Swiss chard germinates at a cooler soil temperature – around 50 degrees – but struggles to germinate above 80 degrees. You can start seeds indoors 3-4 weeks before the last frost, or plant directly just after the last frost.
Warmer climates can direct sow seeds 10 weeks before the first frost in the fall.
There are several seeds in each swiss chard pod, so you will have little clusters of seedlings that will need to be thinned before you transplant outside.
Sow seeds ½ inch deep and space 8” apart. Seedlings begin to come up in about 7-14 days.
Growing Foundations
Leafy vegetables enjoy do well with a supplement of nitrogen, amend your soil with a compost or fertilizer.
Turn your soil over to a depth of 8 inches before planting.
Harvesting Swiss Chard
You can cut leaves off a swiss chard and it will keep growing. Harvest leaf stalks when they are young and tender to get the best flavor and to keep the plant propagating produce.
Always take outer leaves first. Once the final harvest comes, shear all the leaves off.
Swiss Chard Tips
If you are planting chard to consume as baby greens, plant your produce much closer to each other (about 6 inches apart) for maximum leaves for your space.
Tomatoes
| Exposure: | Full sun |
| Prefers: | Warm weather |
| Season: | Summer |
| Hardiness Zone: | 5-12 |
| Temperature Tolerance: | 50-90 degrees F |
| Soil pH: | 6.0-6.8 |
| Days to Maturity: | 80 days |
Starting Tomatoes from Seed
It takes some care to start a tomato from seed, and since tomato starts are widely available at the store, you may be wondering why you should start tomatoes from seed.
The main reason to start from seed is because you get a plethora of tomato options that you just won’t get from the nursery. You can also find a multitude of heirloom species in seed so you can seed-save from the tomatoes you grow.
Tomato seeds need to be started in a sterile potting soil mix or a seed starting mix.
Start your tomatoes in a seed tray or biodegradable pots. Tomatoes need a warm and humid environment to start which can easily be accomplished by putting plastic wrap around the top of the pot secured by a rubber band.
Prep your seed starting mix by mixing warm water in it. Let the mixture sit overnight if its having a hard time absorbing the water. The consistency should be spongy and damp, not soggy.
Plant a few tomato seeds 1/8 deep in the damp starting mix and place in a dark and warm location, between 70-80 degrees.
Tomato seeds will germinate within 5-10 days. Once the seedlings emerge, remove plastic wrap and place under grow lights or fluorescent lights (or try a bright sunny window). Tomato seedlings need 12-18 hours a day of light!
Use a spray bottle to water seedlings, and do not overwater. Damp, not soggy.
The best setup for starting tomatoes is in a greenhouse, or even a mini greenhouse.
Now, once you have adult leaves coming on, you need to transplant your tomato seedling to its own individual pot. This is crucial for the seedling to develop strong roots. Plant your seedling all the way up to its leaves as the stem will grow more roots.
Transplant your seedlings outdoors two weeks after the last frost is complete. Temps below 40 degrees will kill tomato plants so time your transplant accordingly.
You must harden your seedlings before the full transplant. The longer the seedling grows inside, the harder it will be for the tomato to survive the transplant. Pluck early blossoms off the transplant. Tomatoes love heat so you can warm the soil that it is getting moved into by covering it with a plastic bag.
Bury your tomato transplant very deep, you can cover the bottom leaves even.
Growing Foundations
Tomatoes like a light, well draining soil that crumbles easily. If your soil has too much clay, try amending with compost to make it lighter and more acidic. Tomatoes do good in sandy soil mixed with potting soil.
Water regularly in the mornings and keep soil moist, not soggy.
Harvesting Tomatoes
We all want that beautiful vine ripened tomato that is a bright, appetizing red, hanging off our plant. However, you want to harvest your tomato when it is about ½ green and ½ pink and let it ripen completely inside.
Raccoons love tomatoes and will gladly eat all your ripened fruit. They even peel the skin off!
Tomato Tips
Add mulch around the bottoms of your plants a couple of weeks in to help contain the moisture.
Turnip
| Exposure: | Full sun |
| Prefers: | Cool weather |
| Season: | Spring, Fall |
| Hardiness Zone: | 2-9 |
| Temperature Tolerance: | 20-80 degrees F |
| Soil pH: | 6.0-6.5 |
| Days to Maturity: | 45-65 days |
Starting Turnips from Seed
Turnips need to be directly sown into the soil as they do not fare well with transplanting. You can start sowing turnips as soon as the soil temp reaches 40 degrees.
Scatter your turnip seeds about and cover with a fine soil no more than ½ inch. Compress the soil lightly and keep moist. Seedlings come about in 7-14 days.
Growing Foundations
Turnips are an easy grower and are low maintenance. They grow quite fast too. They like loose well-draining soil that has been tilled about 12 inches down. Use a soil amendment if your natural soil is too heavy or poor.
Harvesting Turnips
Harvest your turnip roots once they have reached about 2-3 inches in diameter. You can also harvest turnip tops for greens, but don’t take any off until the root is developed.
Turnip Tips
Keep your turnips free of weeds as these will steal water from the developing roots.
Watermelon
| Exposure: | Full sun |
| Prefers: | Warm weather |
| Season: | Summer |
| Hardiness Zone: | 3-11 |
| Temperature Tolerance: | 50-90 degrees F |
| Soil pH: | 6.0-6.8 |
| Days to Maturity: | 80 days |
Starting Watermelon from Seed
You can start your seeds directly outdoors when soil temps have reached 70 degrees. If you have a short, cooler summer, then start your seedlings indoors about 4-6 weeks before desired soil temps.
Sow a few of your seeds 1 inch deep in a sandy soil that has been amended with compost. You can dig out a 12” deep hole and fill with compost, manure, and sand. This will behoove your watermelon greatly!
Planting in mounds really helps to keep the soil warm and give your watermelon plants tons of room to grow.
Growing Foundations
Watermelons need a good even watering until the fruit reaches full size. Cease watering as fruit ripens to avoid the melon bursting and help concentrate the sugars for better flavor.
Harvesting Watermelon
When the curled piece at the top of the watermelon is turning brown, the plant is no longer feeding the melon and harvesting is near. Look for a deadening vine or crack in the stem; these are all indicators that your watermelon is ready.
Another telltale sign is when the melon goes from shiny to dull. You can thump it and see if it sounds hollow, but that is not always foolhardy.
Melon bellies change color when the fruit is ripe.
Watermelon Tips
Watermelon leaves typically wilt in the afternoon sun, which is ok, but if they start wilting before noon then water them immediately.
If night temps drop below 50 degrees regularly, the watermelon flavor will be bland. If temps rise above 90 degrees for several days, the flowers will fall off.
Winter Squash
| Exposure: | Full sun |
| Prefers: | Warm weather |
| Season: | Summer |
| Hardiness Zone: | 3-10 |
| Temperature Tolerance: | 50-90 degrees F |
| Soil pH: | 5.5-6.8 |
| Days to Maturity: | 70-100 days |
Starting Winter Squash from Seed
Although the title says “winter”, winter squashes like the warmth! The seeds will not germinate below 60 degrees.
Squashes need a fair amount of time to develop, so plan your indoor seedlings accordingly. Winter squashes do best planted in the early spring or the height of summer.
You can soak your seeds overnight to soften up the seed for better germination.
Plant your seed 1 inch deep and 6 inches apart. You can also plant on hills. If hilling, space hills about 3-4 apart. Plant a few seeds in a ring formation at the top of the hill.
Growing Foundations
Squashes can develop powdery mildew on their leaves. Avoid this by adding a mulch underneath the plants and watering directly into the plant, avoid getting water on the leaves.
Harvesting Winter Squashes
Winter squash has a tough outer skin in comparison to its summer squash counterparts. They take a while to develop so leave your fruits on the vine until you cannot push your thumbnail into its skin.
Clip the fruit off the vine and allow to sit in the garden for 1-2 weeks. You can also put them on a sunny windowsill for two weeks.
Winter Squash Tips
Winter squashes can store for 3-6 months in a cool dark place, such as a pantry. Do not wash the squash; rather, rub any soil or dirt off with a cloth and keep dry.